
Portál AbcLinuxu, 9. června 2024 04:26
For a few years I have been a pleased user of a black SONY VAIO VPCEA1S1E, but in the last months I have found out, that it has started to heat up more than usually and the fan became a little more noisy than it used to be. Since the problem seemed to be operating system independent, cleaning of the cooling system appeared to me as the only solution.
Since I had never disassembled a laptop before, I have asked a few friends how to do that. According to them, most notebooks are accessible from the keyboard. It seems, that SONY always needs to have its own solution, as my VAIO has to be disassembled from the bottom.
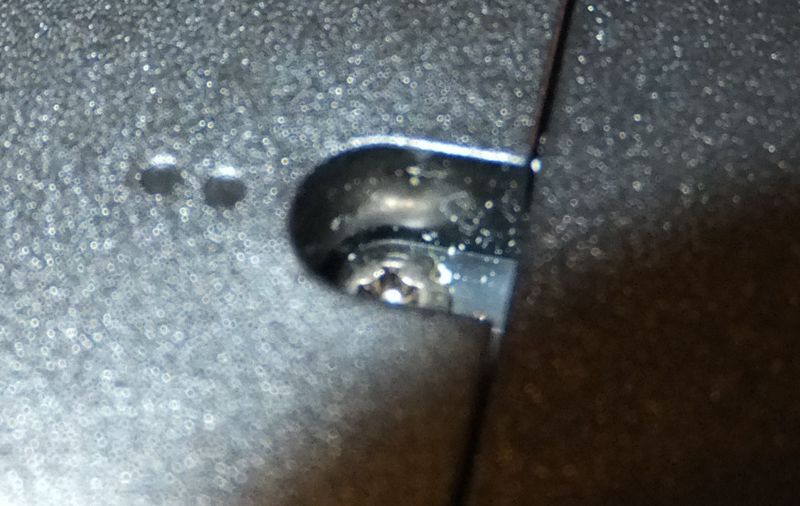
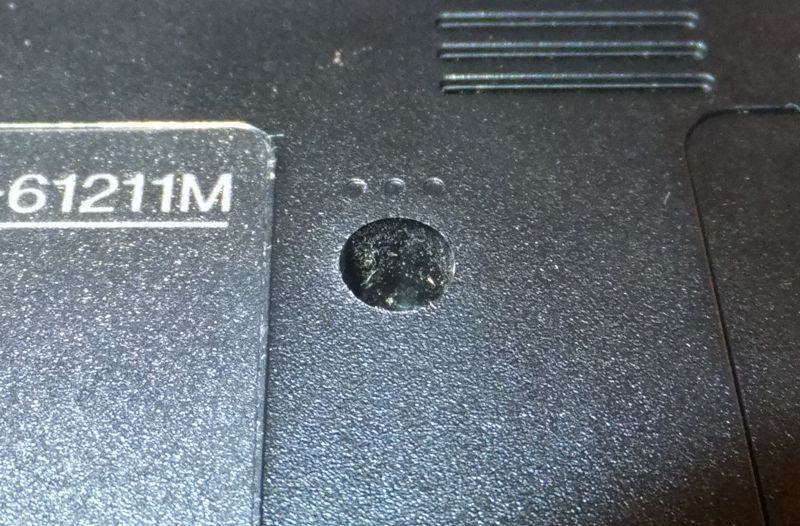
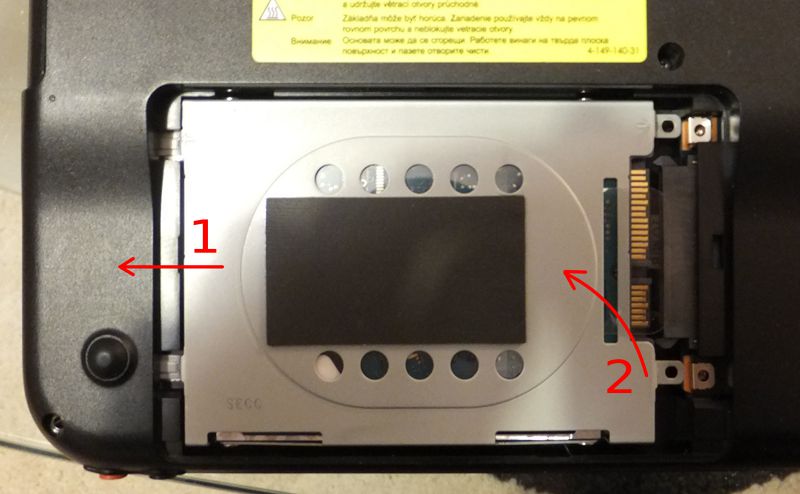
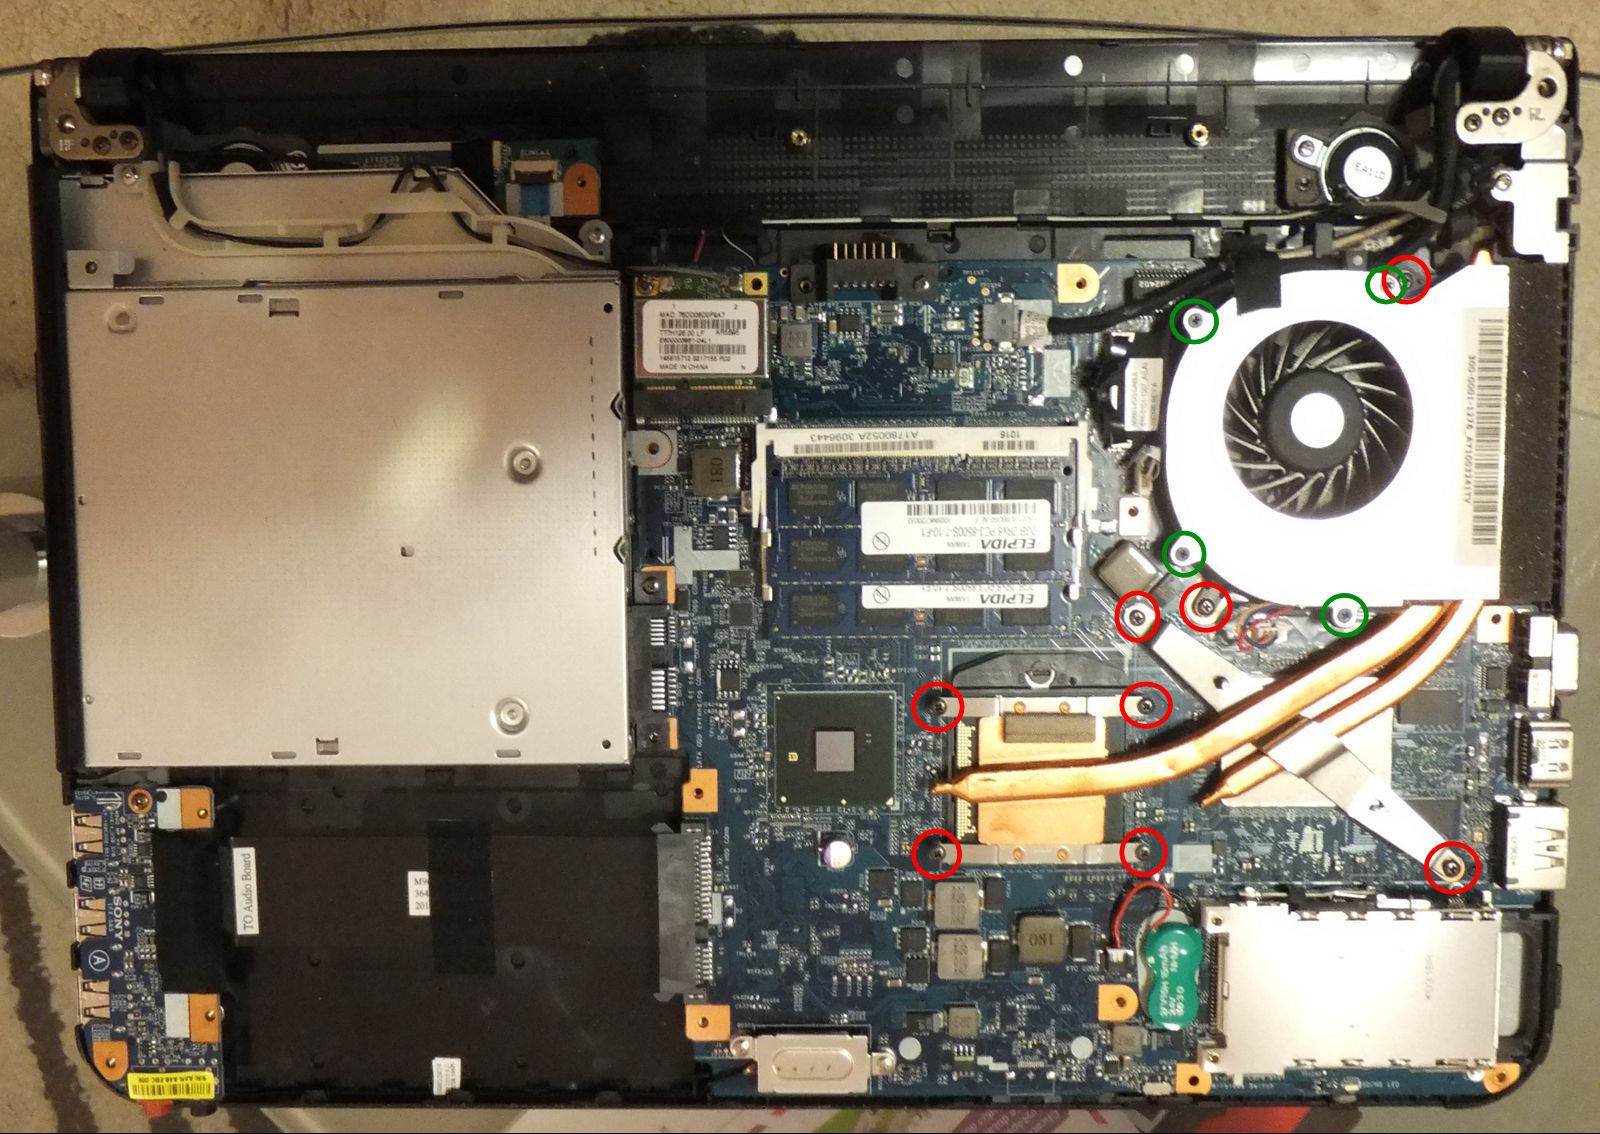
After removal of VAIO's battery many screws to remove are visible. In fact, you do not have to remove only one screw, which belongs to cover of VAIO's memory. All other are needed to be screwed up - this includes 13 unmarked screws holding the cover itself, 2 screws holding the cover of the hard disk bay (marked with two dots) and 2 screws holding the optical disc drive (marked with three dots). This means 17 screws in total. Since there are many types of screws used on the cover, it is also good to remember which screw belongs to each hole, e.g. by laying them on a VAIO back cover picture
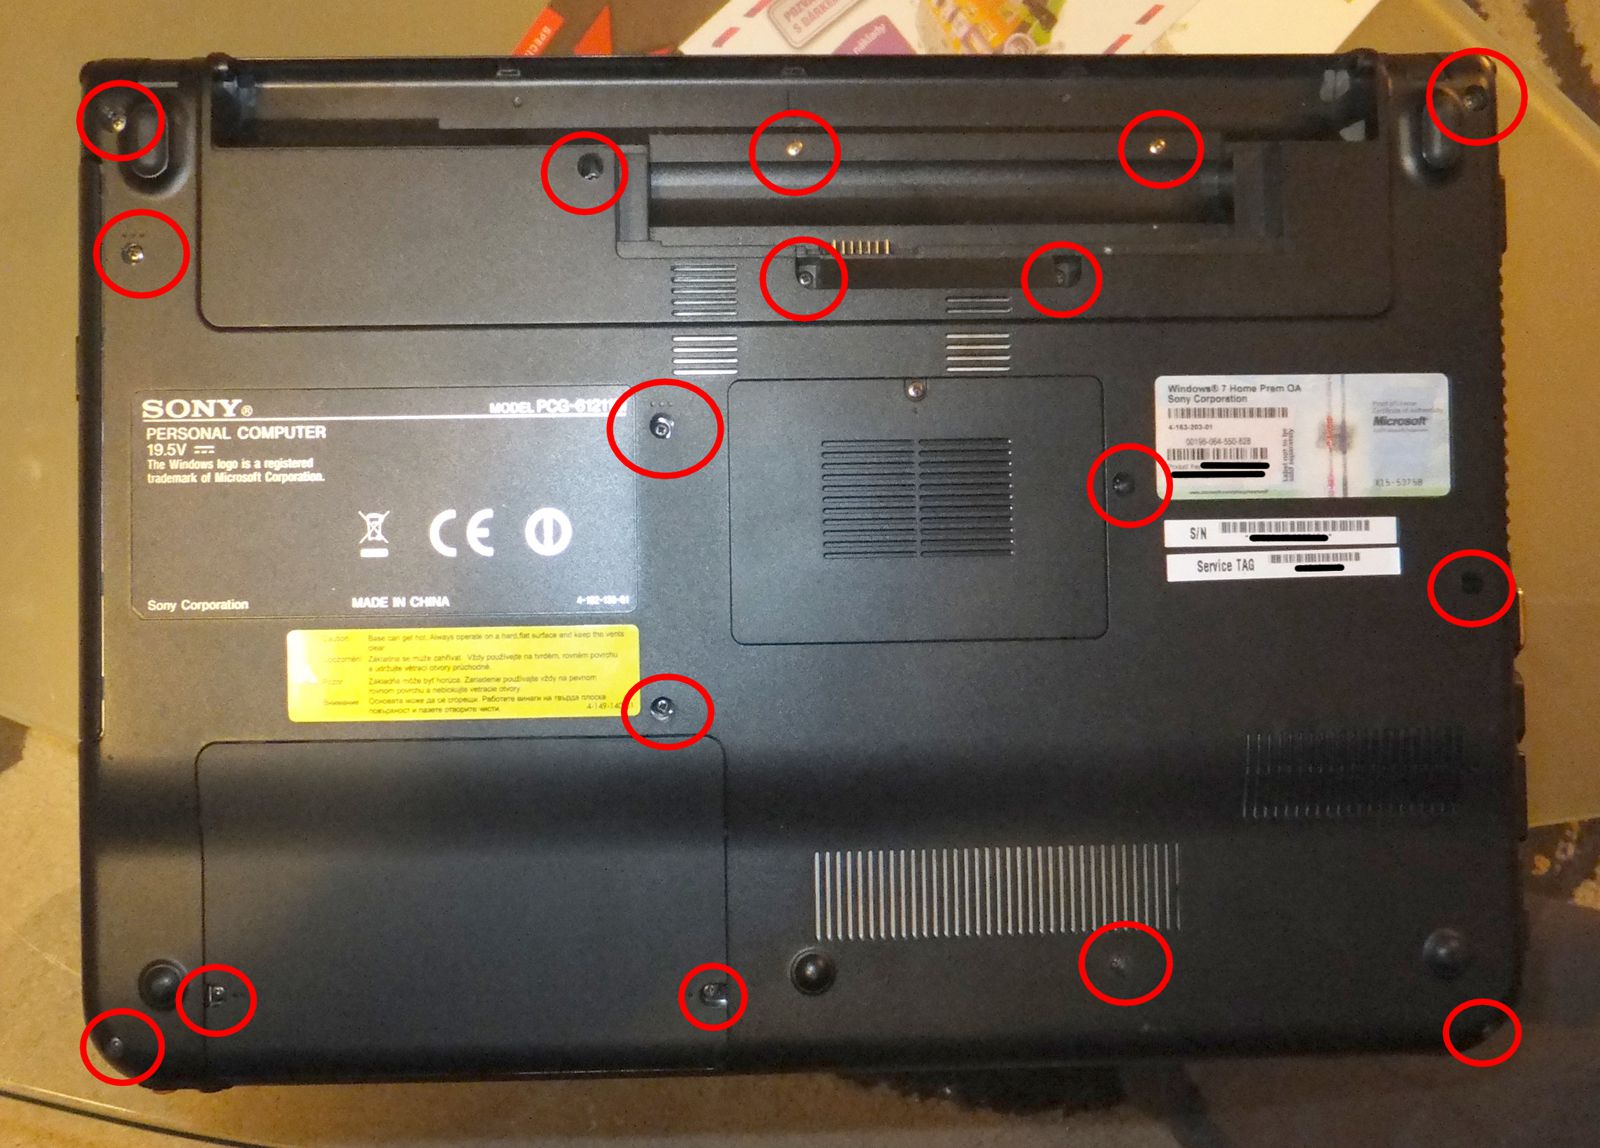
Back cover of SONY VAIO VPCEA1SE and marking of screws with special function
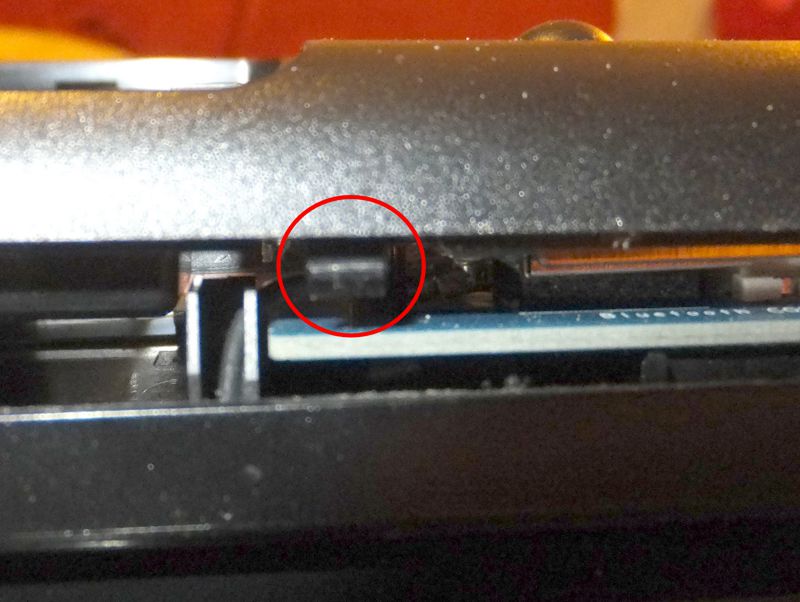
After unscrewing of all 17 screws do not try to remove the cover. It is still held on its place by two more screws in hard disk bay, so you need to open it, screw up remaining two screws and remove the hard disk from the bay. The hard drive may be removed by movement to left (if you have the hard drive in lower left corner) and picking it up.
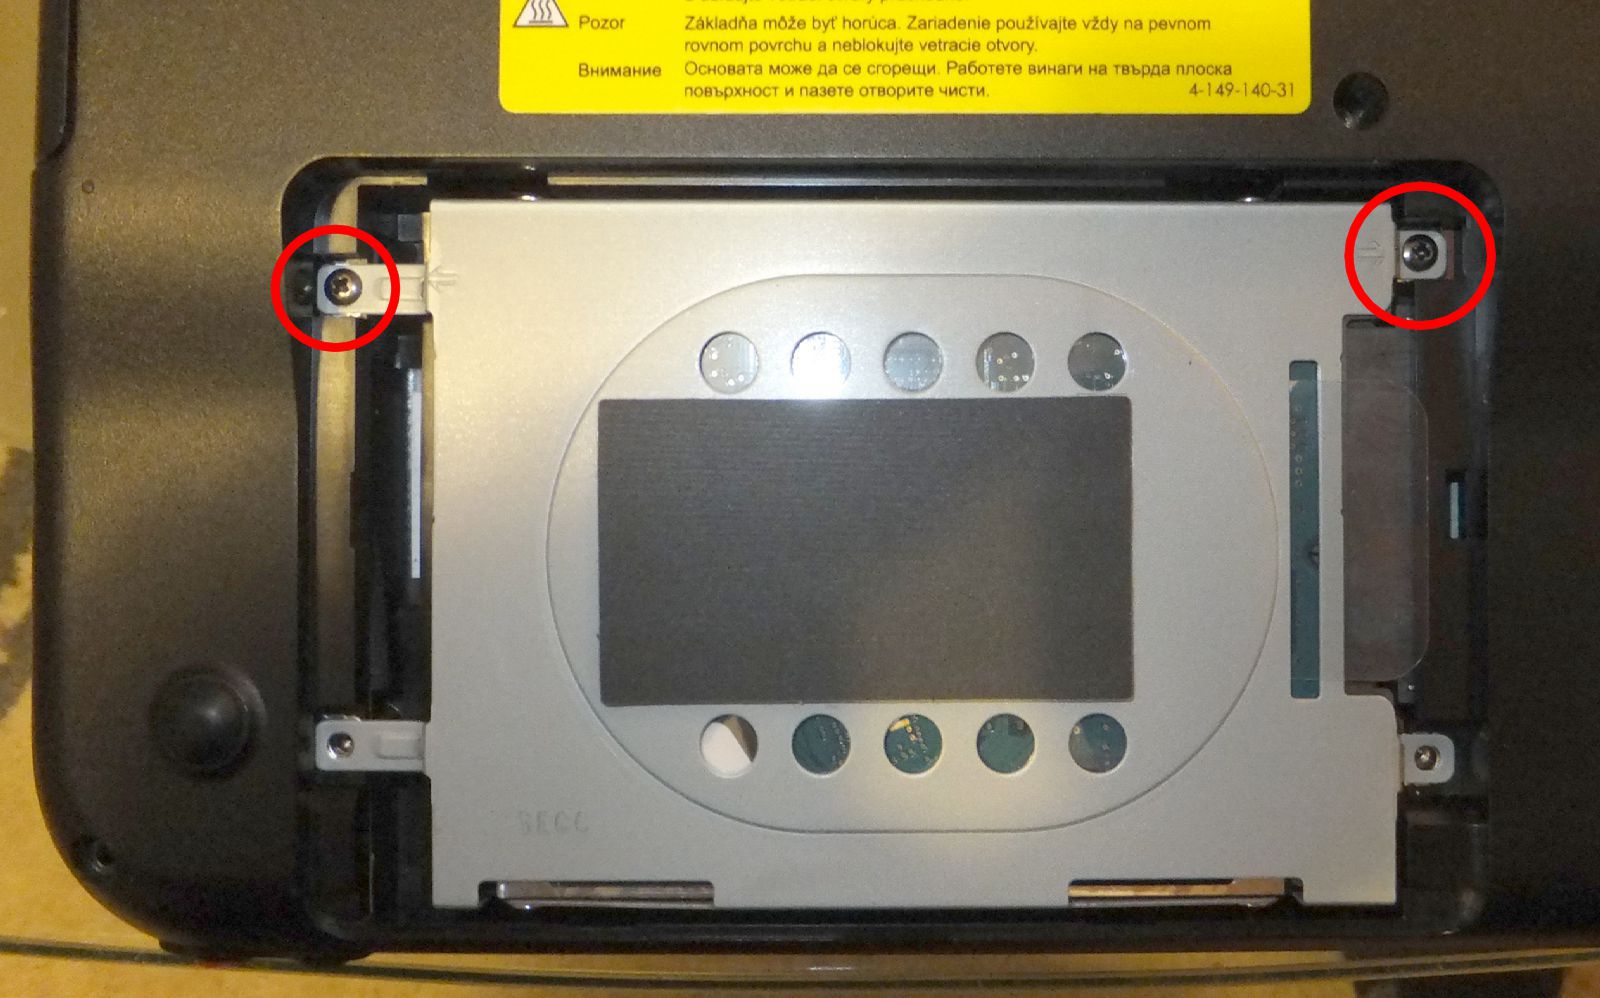

Screws holding the hard disk drive and HDD removal process
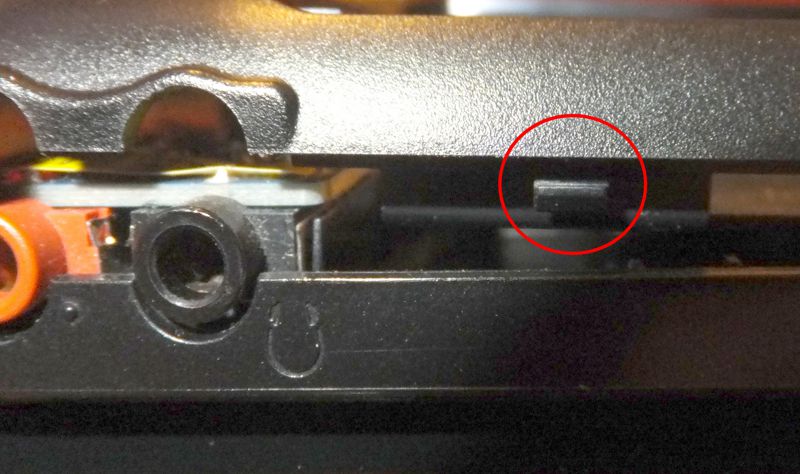
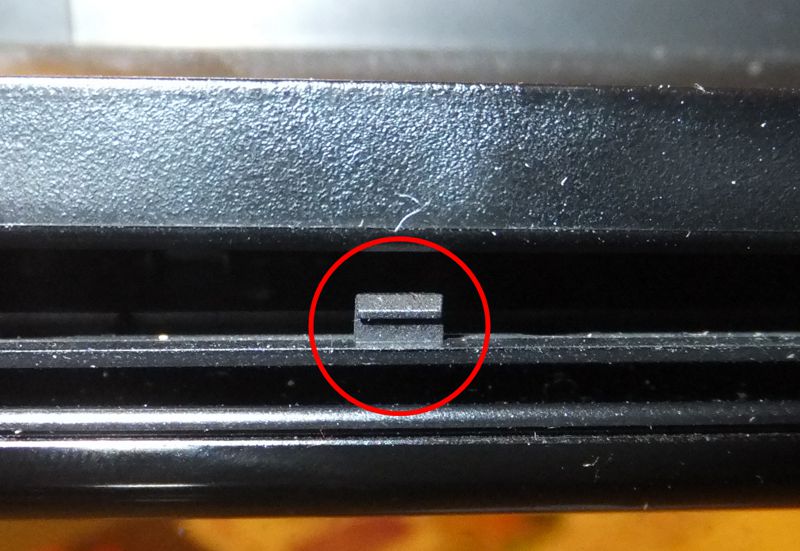
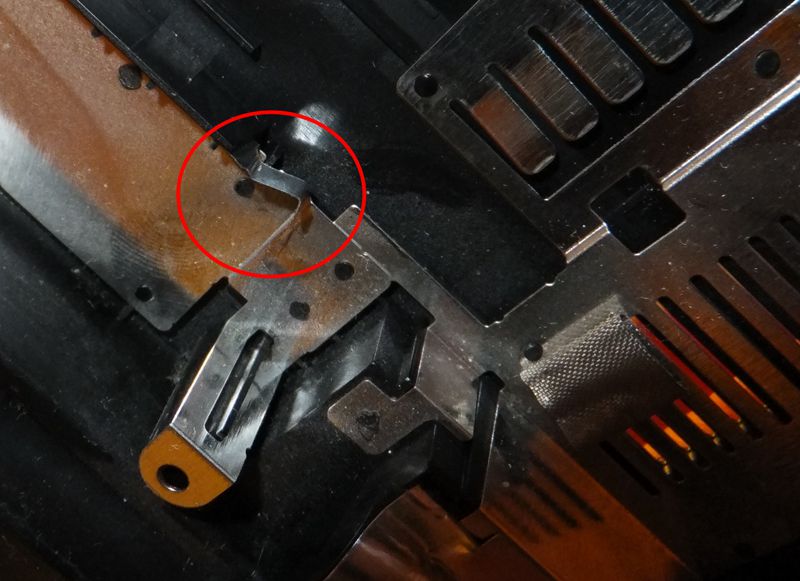
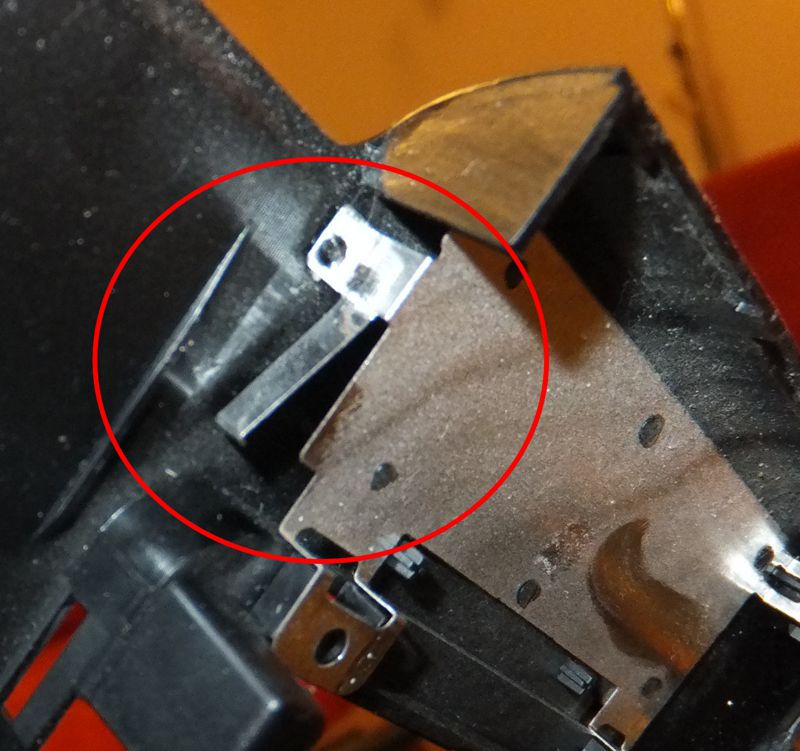
Now it is possible to remove the back cover. Do it carefully, really no exceptional force is needed. After removing all screws the cover is held by three fixtures placed on the front (lower) edge near to the hard drive position. You may help yourself with a tiny screwdriver. On the back (top) side there are seven fixtures - two near to each hinge and three between hinges on the edge behind battery. Now the cover should be released and you will see the whole inside of your VAIO.
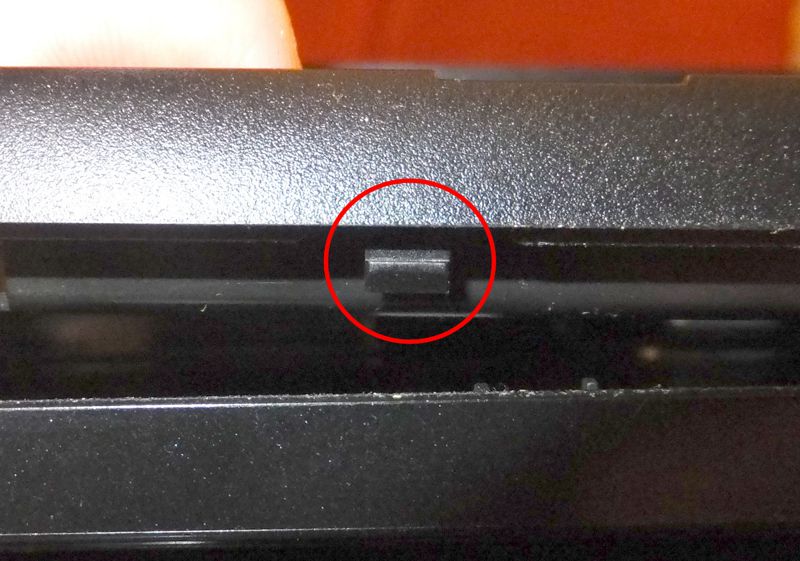
Fixtures on the "hard drive edge" of SONY VAIO

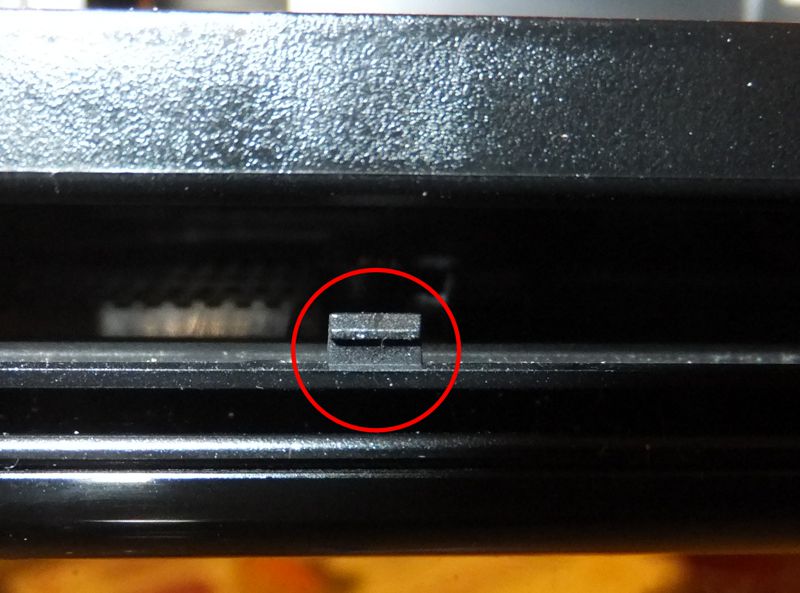
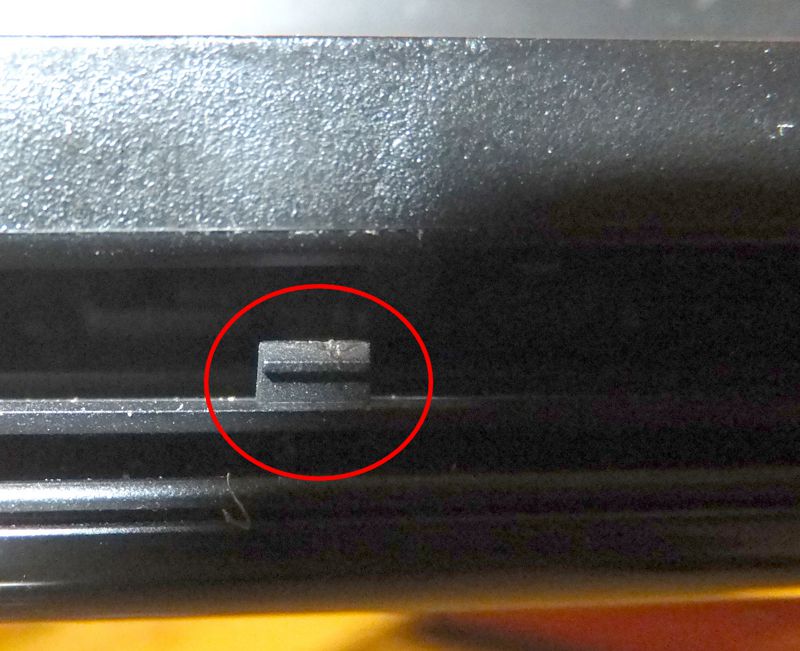
Fixtures on the "battery edge" of SONY VAIO
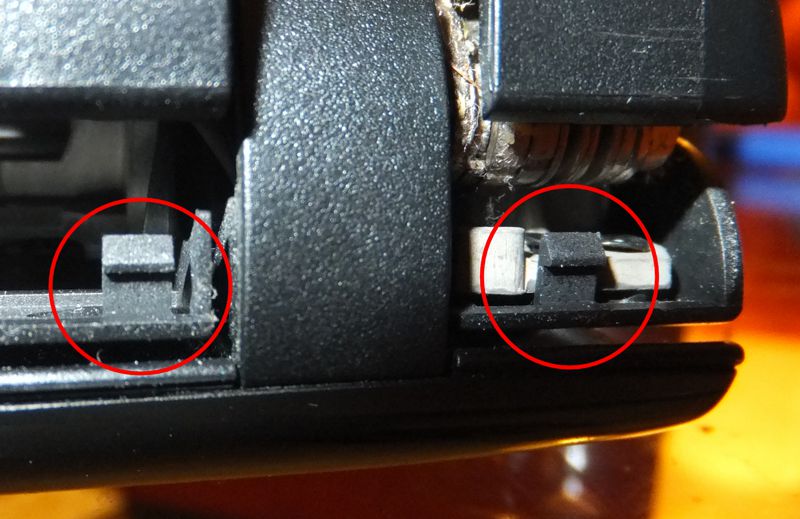
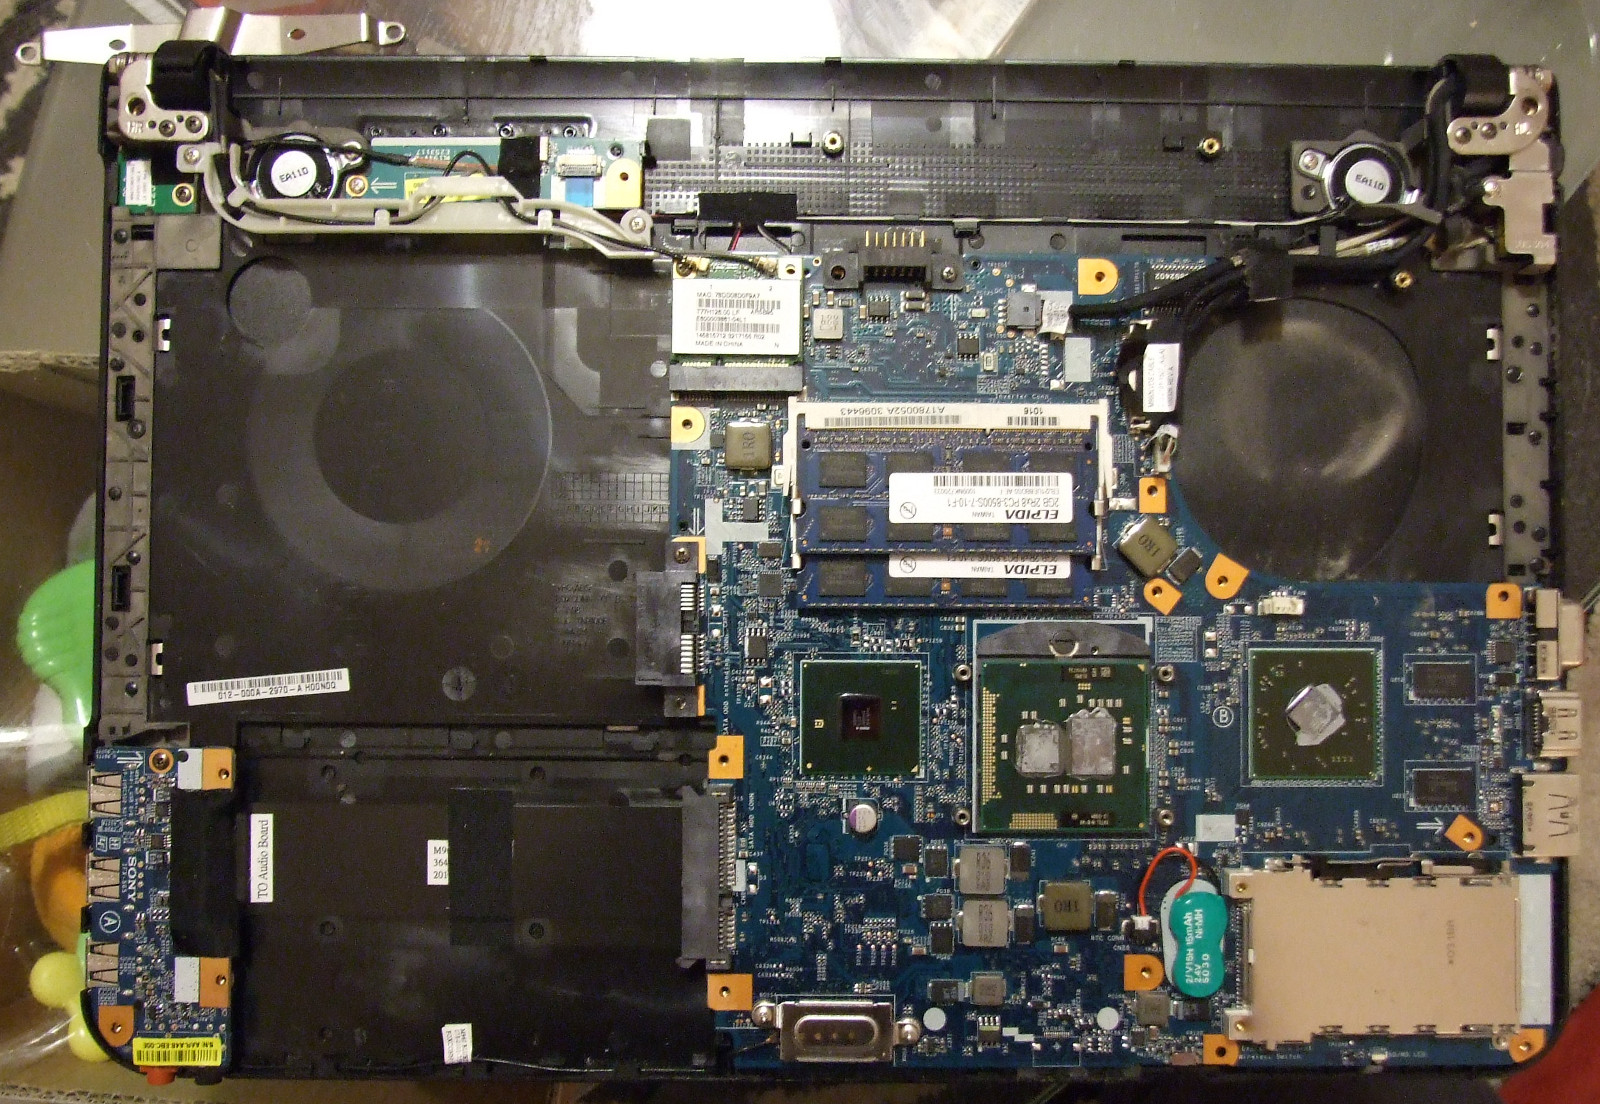
I my case I did only a small cleanup of the fan and cooling ribs and reassembled the laptop again. The most problematic part is placing the back cover right on its position. The cover is equipped by a metal plate which works as electromagnetic shield and forms a contact between metal covered parts inside of the computer to keep them on same potential. This function is ensured by small teeth which complicate the assembly of the laptop. Again, do not use force, or these teeth will be bent and the will not work at all. Just play with them for a while and the cover will fit in its position. Then you may put everything back.
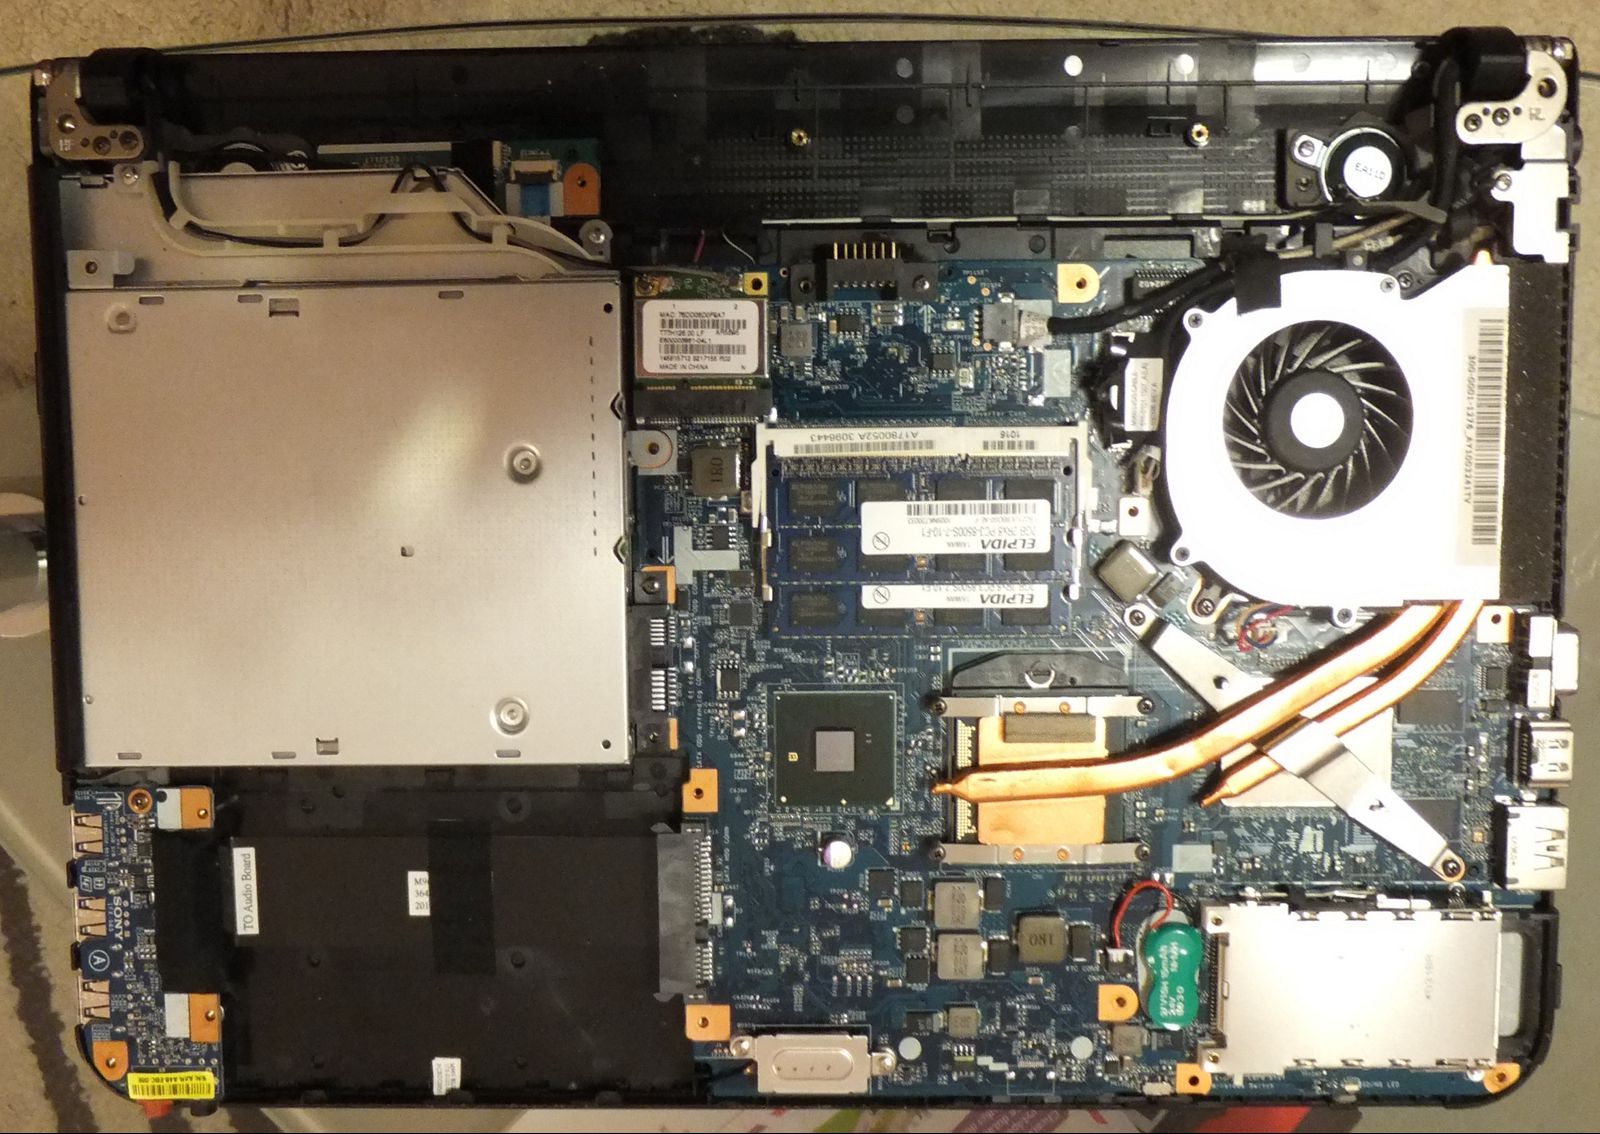
SONY VAIO's hardware

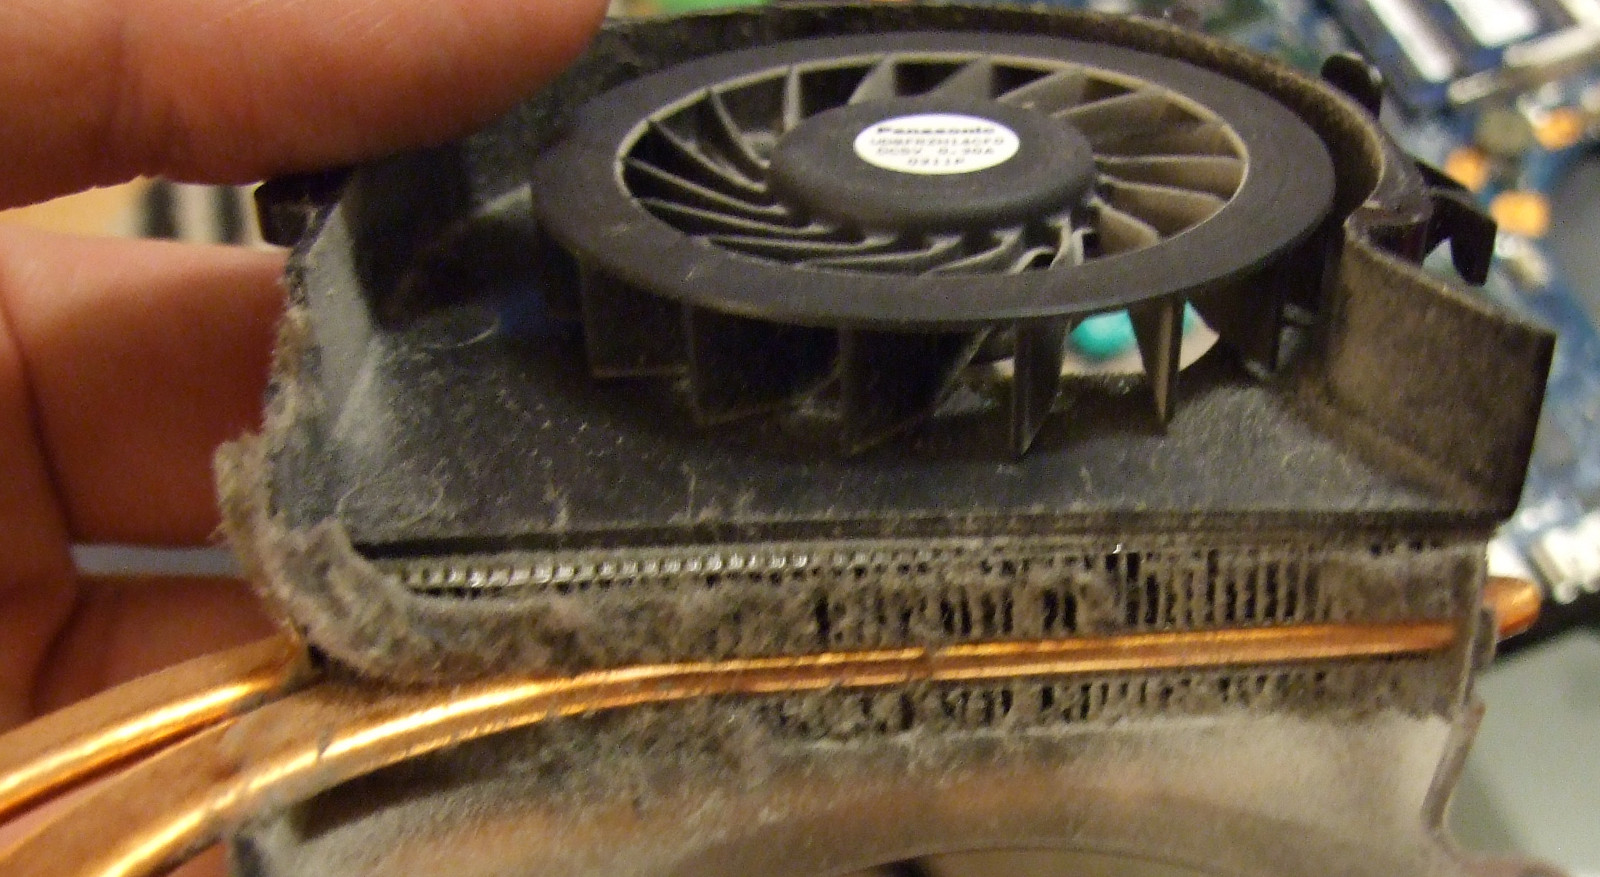
The fan is apparently a product of Panasonic company
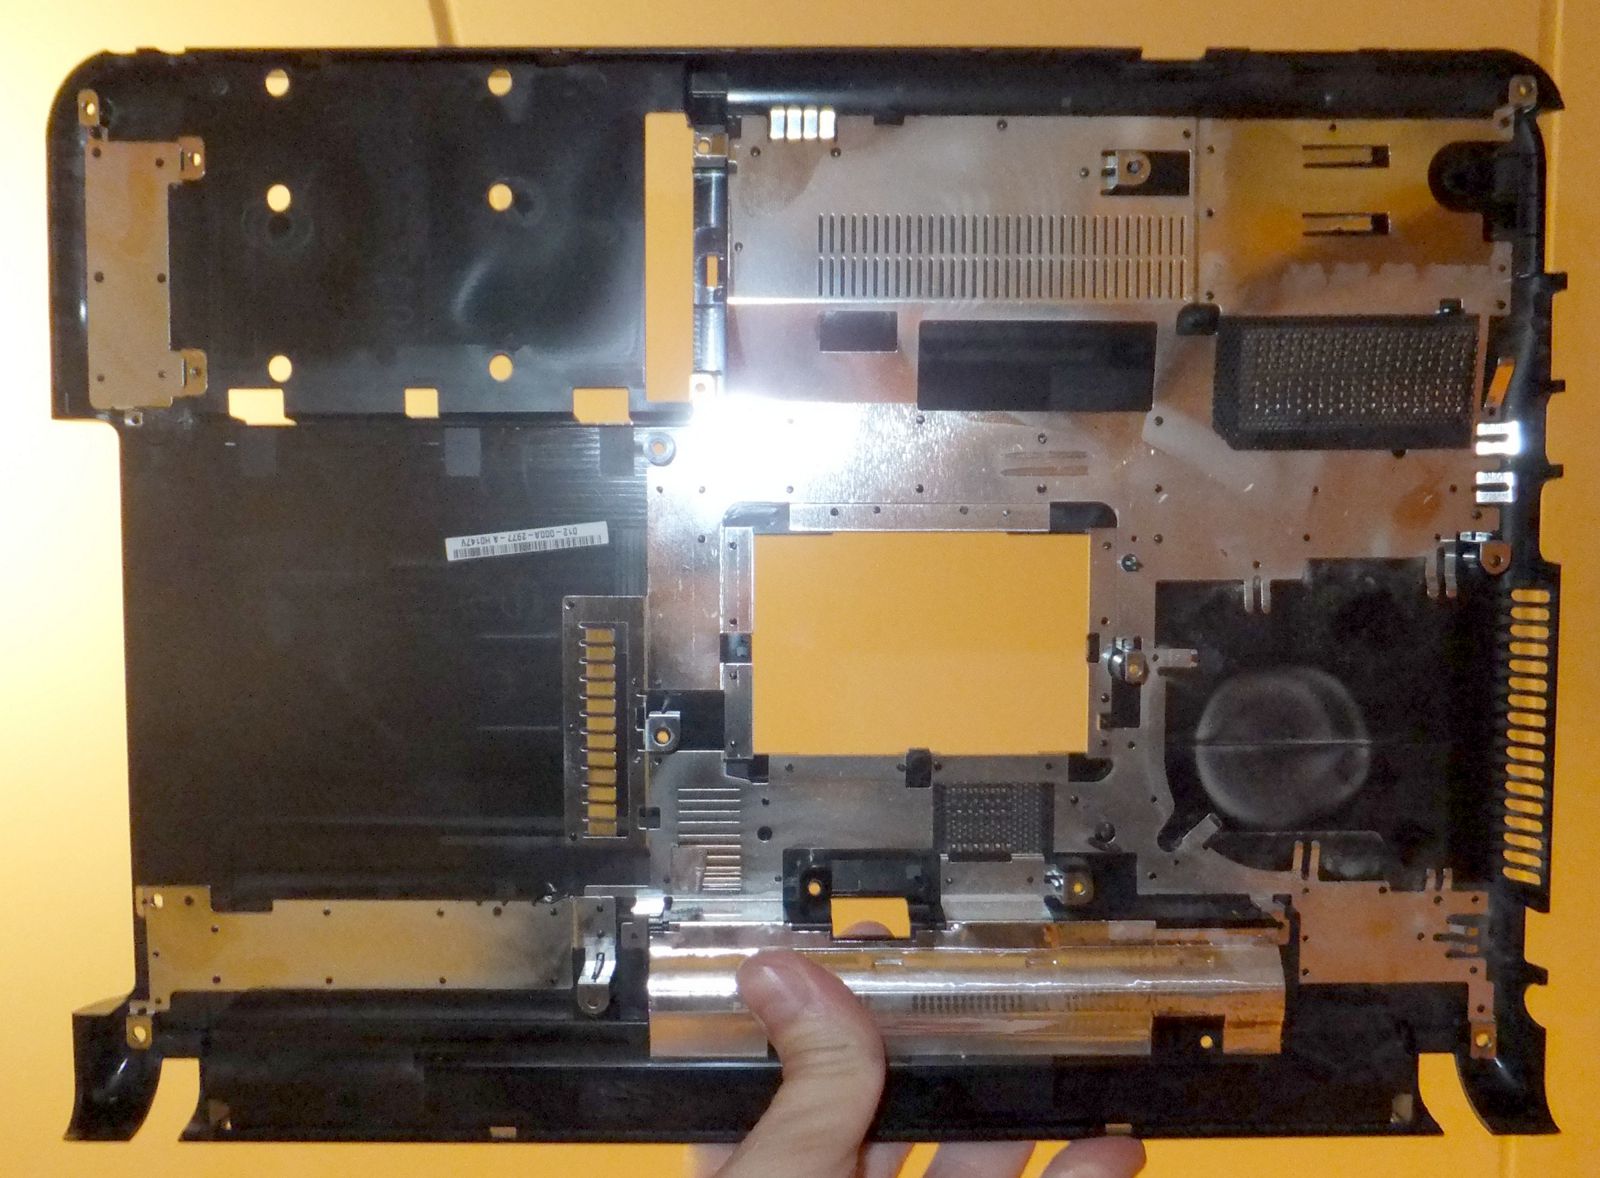
Back cover of SONY VAIO from inside and teeth ensuring electrical contact between devices
Actually I was surprised by the effect of the cleanup - my VAIO is again pretty cold and the noise of the fan dropped to cca 2/3 of previous state. And also - it works
It did not take too long time and the problem was back again. This time I decided to get much deeper into my VAIO. This time I removed completely the fan with heatpipes leading to graphics and CPU. The fan with heatpipes is held by eight screws. After removal of these screws you may carefully separate the heatpipes from the CPU and graphics. Do it VERY carefully since thze copper plates are held very tight by heat conducting paste which got very tough during the time.
The fan may be further disassembled using four screws, which fasten the plastic body and iron heatsink together. After removal of these screws the cooler may be broken and a lot of dust inside od the heatsink appears. After cleaning of this piece the VAIO may be reassembled. The effect is drastic drop of noise to approximately one tenth of previous level.

Tiskni
Sdílej:
![]()
![]()
![]()
![]()
![]()
![]()
(už som sa potešil, že to bude o mojom SONY VAIO P, ale nebolo...)
 30.11.2012 16:43
pushkin | skóre: 43
| blog: FluxBlog
30.11.2012 16:43
pushkin | skóre: 43
| blog: FluxBlog
 30.11.2012 15:46
Jakub Lucký | skóre: 40
| Praha
30.11.2012 15:46
Jakub Lucký | skóre: 40
| Praha
For"few" => několik "a few" => málo Nemohl jsem si to odpustit...afew years I am pleased user of black SONY VAIO VPCEA1S1E, but in last months I found out, that it started to heat up more than usually and fan became a little more noisy thana few years backit used to be. Since the problem seemed to be independent on operating systemindependent, cleaning of cooling system appeared to me as the only solution. Since I have never disassembled any laptop before, I have askedafew friends how to do that. According to their answers most of notebooks are accessible from the keyboard side -at this pointit seems, that SONY always need to have their own solution, since my VAIO is disassembled from the bottom.
30.11.2012 17:03
Jakub Lucký | skóre: 40
| Praha
30.11.2012 16:29
pushkin | skóre: 43
| blog: FluxBlog
Jinak s tím few / a few si taky myslím, že to je obráceně ... few by mělo být pár, a few několik. Změny začleňuji.
P.
For a few years I have been a happy user of black SONY VAIO VPCEA1S1E, but in the last months I have found out, that it has started to heat up more than usually and the fan became little more noisy than it used to be. Since the problem seemed to be operating system independent, cleaning of the cooling system appeared to me as the only solution.
Since I have [fajn, ale had by tady bylo lepsi ] never disassembled a laptop before, I asked a few friends how to do that. According to them, most notebooks are accessible from the keyboard. At this point, it seems that SONY always need to[tady bych dal radeji must a pouzil bych jednotny cislo] have their own solution since[ok, ale treba 'as' by mi tu znelo lip] my VAIO has to be disassembled from the bottom.
4.12.2012 10:34
pushkin | skóre: 43
| blog: FluxBlog

ISSN 1214-1267, (c) 1999-2007 Stickfish s.r.o.
